
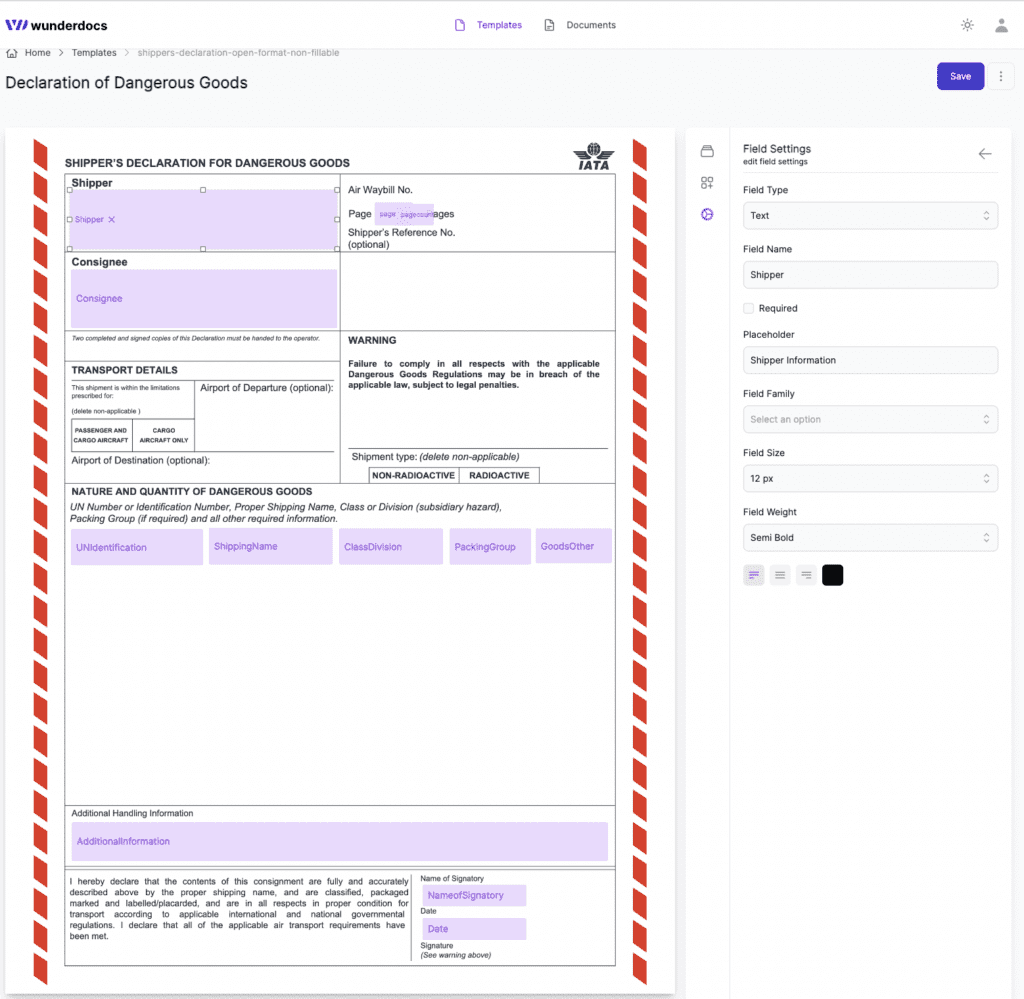
A Shipper’s Declaration for Dangerous Goods, commonly known as a Dangerous Goods Declaration (DGD) document, is a crucial document needed for the shipping of hazardous materials. Important details about the risky products being transported are communicated through it so that carriers and other parties involved are aware of the dangers and can take the appropriate safety measures.
Typically, the DGD contains the following details:
- Shipper and consignee information: The sender’s and the recipient’s names and addresses.
- Transport information, including the mode of travel (air, sea, road, or train) and any pertinent transport document identification numbers.
- The proper shipping name, the UN number, the hazard class, and the packaging group of the risky products.
- Packaging amount and type: The total number of dangerous items in each package, their total weight, and, if appropriate, the net explosive mass of any explosives.
- Packing instructions: Specifics on how the items should be packaged in accordance with the applicable rules for the mode of delivery.
- Contact information for a person or organization that may offer rapid guidance on handling events involving dangerous goods in case of an emergency.
- Declaration statement: A statement made by the shipper certifying that the products are properly packaged, labeled, labelled, and classified for shipment in accordance with the rules that apply.
The DGD helps in ensuring that hazardous materials are transported safely and in compliance with national and international laws, such as the International Maritime Dangerous Goods (IMDG) Code for maritime transit.
With wunderdocs you can automate the filling of the Dangerous Goods Declaration PDF from your ERP, any API or just a simple Excel Sheet or Google Spreadsheet in minutes.
To fill the document you just need to:
- Create a new wunderdocs template
- Add the necessary fields the the template
- Connect your template to a zapier or make.com workflow by using your wunderdocs API Key which you find in the settings
- Automatically populate the template and send the final document to a workflow of your choosing

After connecting wunderdocs to zapier or make.com you can connect your template fields to the input of your choosing simply by adding each field to the payload of your action